
Trying to go minimalist with my everyday carry so decided to try making a key and access card holder to replace my bulky one. A few things I really was particular about:
- Keys must be covered (to prevent scratching other items in my bags)
- Needs a slot for my access card
- Button closure for security
- Can be made with what I already have
So based on these, I sketched out some ideas and checked what materials I had at home. I don’t have anything that can hold multiple keys, I only had some old keychains I can reuse. I still had some leather scraps but they were quite soft so I had to think of how to make it work. I also wanted it to be easy to make and not require sewing. Soft leather is quite hard to sew nicely so it should be made with glue and rivets.
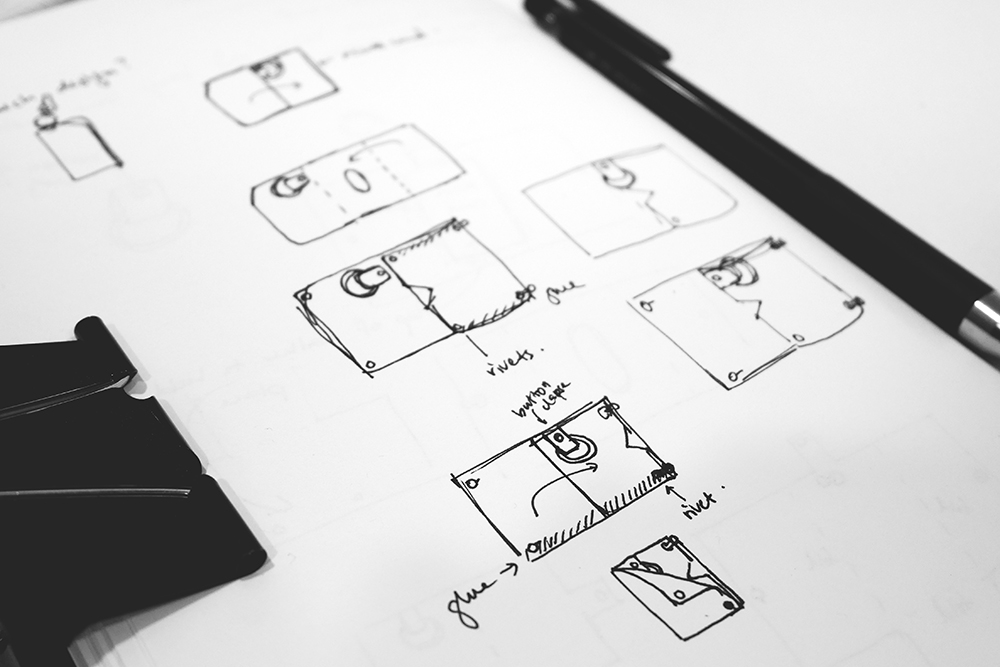
Once I had a rough idea, I created a draft template in illustrator and printed it out. I used the print out to test the ideas and modify as necessary.


At this point I decided to take it out for a test run and realized the closing flap was too long and loose. The keychain was also a bit too heavy for such soft leather.


Final thoughts
I really liked how this turned out. It suits my needs perfectly and the card slot area fits another 3 additional cards so I can use it as a minimalist wallet if I ever want to. It’s definitely a much slimmer profile compared to my previous key and card holder. I leave the top unbuttoned for faster access to my keys but when I’m out I close it so the keys are kept securely inside.
I definitely want to visit this project again in the near future, but this time I plan to purchase some harder leather. This was a no-sew leather project so next time I would like to try sewing it instead to give it a more polished look. I also read about leather burnishers and how it can be used to finish the “flesh” side of the leather and edges so I might get some and try it too. I haven’t decided if I should stick to the same method I used to attach my keys or to try and find some 4-6 ring key holders.
If you would like to play around with this template, you can download it below. It’s a very rough template so please don’t expect something professional level!


You should have a contact us page! I’ve just picked up leathercrafting as a hobby a couple months back and stumbled upon your list of resources while searching for local tools & leather shops.
Finding it hard also to find a community of leathercrafting hobbyist in Malaysia. Would love to get in touch and exchange some info.
Hey! Sorry for the late reply. Thanks for dropping by. Good idea, I’ll try to add a contact us page. 🙂